Google Chrome saves your history whenever you search for a website in the search engine. Most of us use incognito mode if we don’t want google to save our browsing history
Incognito mode works best when you want to surf the Internet in private mode but what if we do not want to use Incognito mode and at the same time want to prevent Google from recording our browsing history. Let us learn the steps to prevent Google Chrome from saving our browsing history in Windows11.
Windows 11 operating system allows you to disable the settings to save browsing history on your local storage
How to Disable Google Chrome from Saving Browsing History
Step 1: Go to the search bar in the bottom tab
Step 2: Type Registry Editor in the search bar and open it.
Step 3: First of all, click on the Windows Search and type in Registry. Next, open the Registry Editor from the list.
Step 4: Now, you will see a User access control dialog box. Click on the Yes button to proceed.
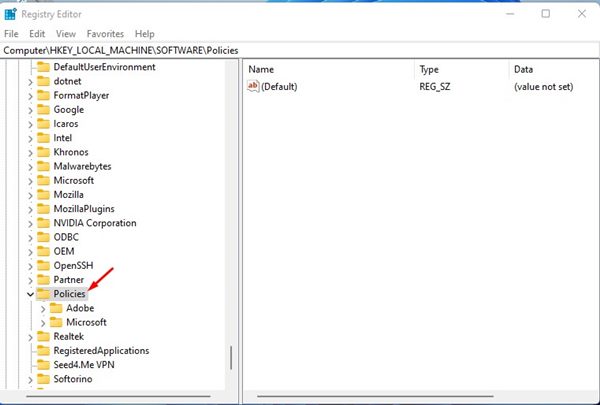
Step 5: Under the Registry Editor, you need to look for the following path:
HKEY_LOCAL_MACHINE\SOFTWARE\Policies
You can also copy and paste the given path to reach the policies area.
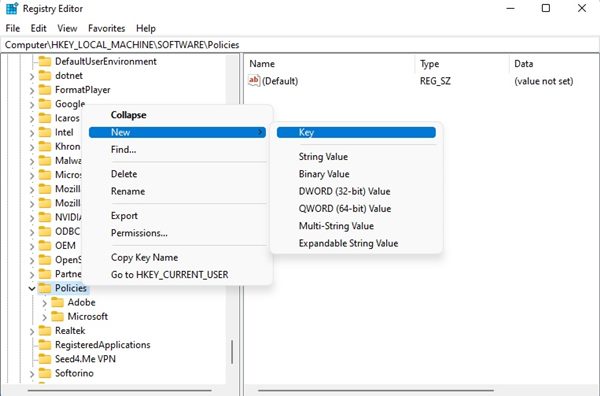
Step 6: Then right-click on the Policies and select New > Key.
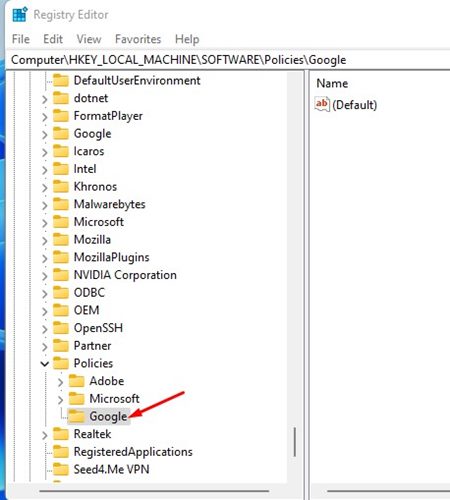
Step 7: Add the name of the new key as Google.
Step 8: Then again click on the Google key >> New
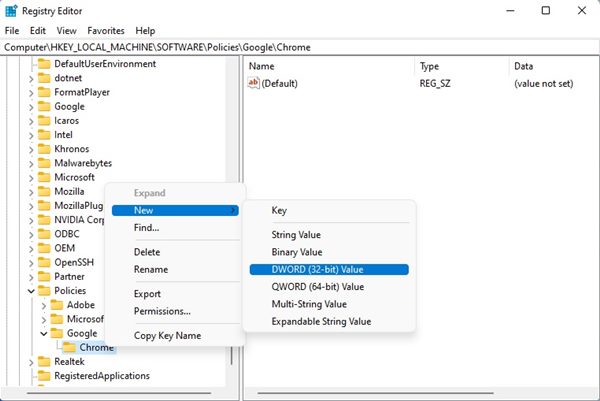
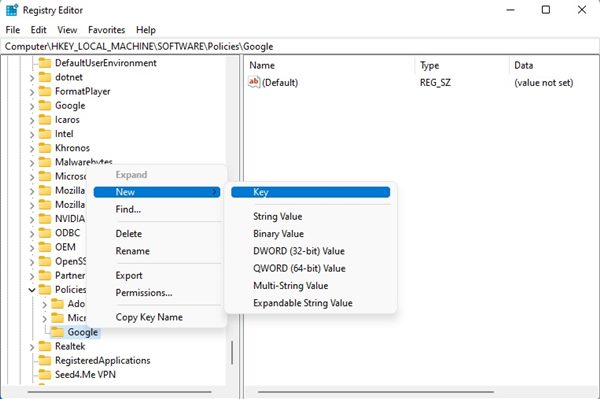 Step 9: Now rename it to Chrome. Again Right-click on Chrome key and select New > DWORD (32-bit) option.
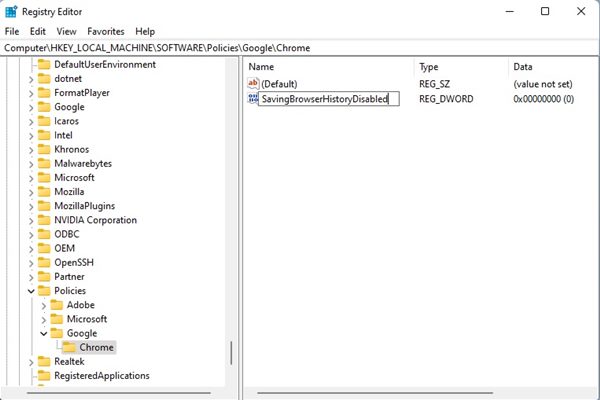
Step 10: Now, its time to rename the newly created DWORD value as SavingBrowserHistoryDisabled
Step 11: Now you have to double-click on the SavingBrowserHistoryDisabled key. Go to the Value data field, enter 1 and click on the Ok button.
That’s all! Now google chrome will not save your browsing history.
How to Turn on Google Search History Again
If you wish to enable Google search history again then you will have to set the value as 0 in the last step. After doing this now you need to delete the Google Key you created in Step no. 5.
So, these were the steps to disable Google from saving browsing history. Hope you found the tutorial useful. If you have any queries, feel free to ask me through the comments section below. Stay tuned to TechAdvises for more such tech tutorials and updates.

